
For this Do Rag, I used my unwanted turtle neck long sleeved shirt which is made of stretchy cotton/polyester blend fabric. I made up my own pattern for this project.

Cut away the sleeve seams as well as the armhole seams.

Open up the sleeve and lay it flat and lay the center panel pattern of the cap (Do Rag) on it and pin the pattern, making sure to follow the instructions written on the pattern piece.

Lay the side panel pattern of the cap over the shoulder area of the shirt and pin it in place so that the pattern does not move during cutting.

Lay the band pattern of the cap over the other side of the bodice of the shirt and pin it in place.

Mark the required cutting allowance on the fabric as/if required on all pattern pieces.
Note the dot on the pattern pieces indicates where stitching should start.

Cut the fabric as marked for each pattern piece. The pattern states that for a small size adult no cutting allowance should be added, so I cut the fabric plum with the patterns and adjust the dot of the center panel 1/4 inch from the edge.


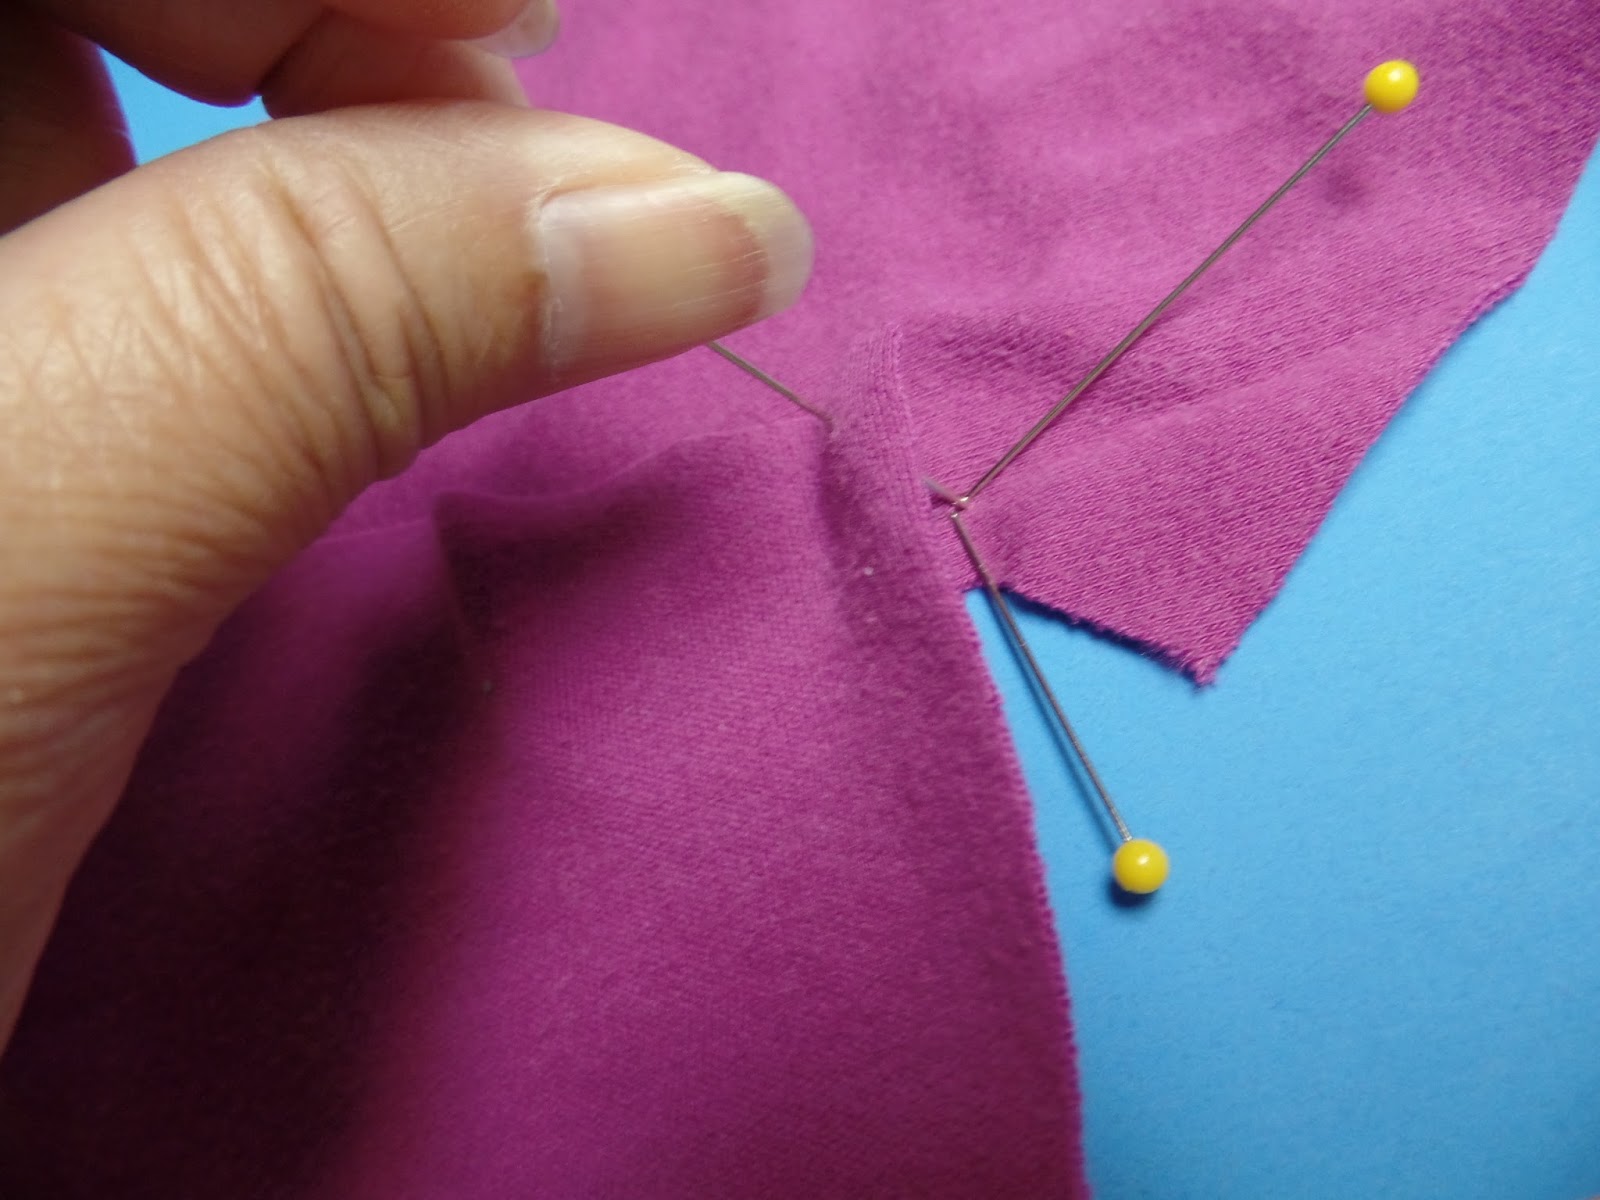
Pin the side panel and center panel together at the dot. Use a pin to mark the dot onto the fabric.
Pierce a pin through both pieces starting at the marked (pinned area) from back to front along the raw edge of the two fabric pieces which are the center panel and the side panel. Do the same for the other side of the cap. See the photos below for this process.


Using a thread that matches the color of the fabric, use a narrow zigzag stitch to seam the two pieces together, starting at the dot(pinned area) of the fabric. Machine setting: stitch width = 2mm, stitch length = 2 and 1/2 mm. The reason for using zigzag stitch is so that the seam is flexible and the thread would not break when the seam is pulled or stretched. Do the same for the other side.


Finish the raw edges by using a wider zigzag stitch (stitch width = 3mm). with the cap facing wrong side up, lay the raw edge toward the center of the center panel and zigzag stitch starting at the dot. Remembering to leave 1/4 " seam allowance on the side panel free. Do the same for the other side.


Fold the center panel lengthwise matching raw edges evenly and mark the center using a pin.
Fold the band crosswise and mark the center using a pin also. Bring these two centers together.

Open the band and use a pin to pierce the marked center from the wrong side of the band through the center of the front center panel. Remove the 2 pins that marked the centers and retain the last pin. Secure these pin at the center of both fabric and thread through both layers to keep them together.


Seam the two ends of the band. With the cap facing right side up, mark its center back with a pin. Open the the seam and keep it open by pinning the raw seams onto the cap's center back which is marked with the pin. Note: To find the center of the (turtle tail or center back of the cap), match the seams even, the center is where the fold falls. Finish pinning the band and the cap around, distributing the slack or looseness of the cap evenly around the length of the band. Note that the right side of the cap is facing up and the wrong side of the band is facing up.


Using a narrow zigzag as before, stitch the band and cap together starting at the dot and ending on the dot at the other side of the turtle tail. The photo shows my index finger and little finger pointing to these dots which is marked with pins. Note that the band is on top of the cap when stitching these two together. The reason for this is that the raw edge of the band is lined up with the straight grain of fabric which has very little stretch, while the raw edge of the cap is aligned with the cross grain of the fabric which stretch a lot more. When sewing, the sewing machine tends to stretch the fabric, so the top layer needs to be stable to minimize this effect.


Turn the cap wrong side out and turn the raw seam toward the band. Fold the raw edge of the band over the raw seams of the cap. Using a wide zigzag stitch, and the raw edge of the band even with the cap seam, sew over the raw edge around, starting and ending on the same spot. The zigzag stitch will prevent the edge from fraying. Note that the turtle tail of the cap is left free.

Whew!!! Too many steps and 20 or more photos and it seemed that it took me forever to write the sewing instructions and especially to load the photos! But it is finally done. It took less time to make it than to write the instructions on how to make it. The reward is the joy of having made something nice and useful out of a would be discarded shirt:)!


My family and I really enjoyed wearing the hat! It is really good to wear under helmet when biking or just wear it for protection from the sun and when working in the yard. It also keeps the bugs and dust out of ones hair but most of all it absorbes sweat which, without the hat, would be running from ones forehead to the eyes.


